Rosebud’s Butter Topped White Bread
There’s nothing quite like the aroma of freshly baked bread filling your kitchen—especially when it’s a soft, buttery loaf that’s perfect for slathering with jam or serving alongside a hearty meal.
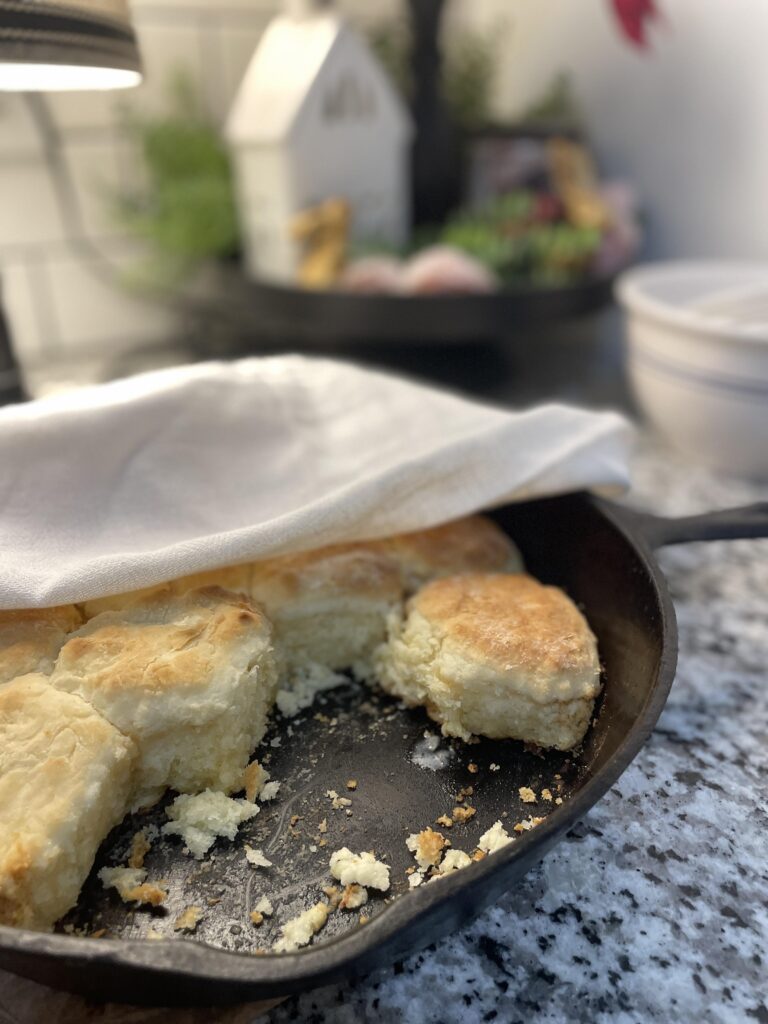
There’s just nothing like homemade bread. I found this recipe at the Curvy Carrot and it immediately became one of my family’s favorites. There’s just something so special about a soft slice of homemade sandwich bread – whether you make a sandwich with it or serve it warm with butter. Yum!
I know you’ll love this recipe and want to add to your list of go-to bread recipes!

I love making bread. I try to make fresh bread on a weekly basis, often more than once during a week. For years my favorite bread has been my Sweet Sourdough Bread due to its simplicity in preparation and its delicious taste and texture.
I still love that bread for making toast and just for eating in general. But this bread. Oh. My. Goodness. This is the most wonderful white bread I have ever made. Perfect for sandwiches. Perfect for toast. Croutons.
You can slice it thin and it has the softest texture of any homemade bread I have ever made. I plan to try this recipe for rolls and buns, too. Oh, and my loaves rose a good 5 or 6 inches! Beautiful!

- I found this recipe at the Curvy Carrot. Be sure to stop over there and say hello!
Rosebud’s Butter Topped White Bread
You’ll find the printable recipe at the bottom of the post. ⬇️
- 4 and 1/2 teaspoons dry active yeast (or the equivalent of two packets)
- 3/4 cup warm water
- 1/4 cup granulated sugar
- 1 tablespoon salt
- 3 tablespoons unsalted butter, room temperature and cut into pieces
- 2 and 2/3 cup additional warm water
- 9-10 cups all-purpose flour
- 4 tablespoons (1/2 stick) unsalted butter, melted, for brushing the tops of the loaves
- Additional butter/cooking spray, for greasing your rising bowl and loaf pans
How to Make Butter Topped White Bread
Step 1. In the bowl of your standing mixer fitted with the paddle attachment, dissolve the yeast in 3/4 cup of warm water, about 5 minutes.
Step 2. Add the sugar, salt, butter, additional 2 and 2/3 cup warm water, and mix gently to combine.
Step 3. Slowly add 5 cups of the flour, mixing on low speed until smooth.
Step 4. With the mixer on its lowest speed, slowly add the remaining flour until the dough is smooth.
Step 5. Switch to your dough hook attachment and knead the dough for 10 minutes. Or, alternatively, you can do it the old fashioned way and knead the dough by hand.
Step 6. While the dough is kneading, lightly grease a large bowl with butter or cooking spray, as well as two loaf pans.
Step 7. Once the dough is ready, place the dough in the greased bowl and turn over to completely coat the dough with butter/cooking spray. Cover, and set in a warm place to rise for 1 hour.
Step 8. After an hour, gently punch down the dough and divide it into two portions.
Step 9. Working with one portion at a time, roll (with a rolling pin) the dough out into roughly 12″ x 12″ square, making sure that the thickness of the dough is uniform throughout.
Step 10. Slowly and tightly roll up each rectangle, sealing the edges firmly.
Step 11. Tuck the ends of the roll tightly under the bread and place into your prepared loaf pans. Repeat with the second loaf. Cover the loaves, set in a warm place, and let rise until doubled, about another hour.
Step 12. Place one rack on the lowest position in the oven and preheat the oven to 425 degrees.
Step 13. Bake the loaves for 15 minutes, then cover each loaf with aluminum foil to prevent the tops from browning too much.
Step 14. Once covered with foil, bake for an additional 15 minutes.
Step 15. Remove the loaves from the oven, place on a wire rack to cool, and lightly brush the loaves with the melted butter.

Rosebud's Butter Topped White Bread
This Butter-Topped White Bread is soft, fluffy, and perfectly golden with a rich, buttery finish. A classic homemade loaf that’s easy to make and perfect for sandwiches, toast, or enjoying warm with a pat of butter.
Ingredients
- 4 and 1/2 teaspoons dry active yeast (or the equivalent of two packets)
- 3/4 cup warm water
- 1/4 cup granulated sugar
- 1 tablespoon salt
- 3 tablespoons unsalted butter, room temperature and cut into pieces
- 2 and 2/3 cup additional warm water
- 9-10 cups all-purpose flour
- 4 tablespoons (1/2 stick) unsalted butter, melted, for brushing the tops of the loaves
- Additional butter/cooking spray, for greasing your rising bowl and loaf pans
Instructions
1. In the bowl of your standing mixer fitted with the paddle attachment, dissolve the yeast in 3/4 cup of warm water, about 5 minutes.
2. Add the sugar, salt, butter, additional 2 and 2/3 cup warm water, and mix gently to combine.
3. Slowly add 5 cups of the flour, mixing on low speed until smooth.
4. With the mixer on its lowest speed, slowly add the remaining flour until the dough is smooth.
5. Switch to your dough hook attachment and knead the dough for 10 minutes. Or, alternatively, you can do it the old fashioned way and knead the dough by hand.
6. While the dough is kneading, lightly grease a large bowl with butter or cooking spray, as well as two loaf pans.
7. Once the dough is ready, place the dough in the greased bowl and turn over to completely coat the dough with butter/cooking spray. Cover, and set in a warm place to rise for 1 hour.
8. After an hour, gently punch down the dough and divide it into two portions.
9. Working with one portion at a time, roll (with a rolling pin) the dough out into roughly 12″ x 12″ square, making sure that the thickness of the dough is uniform throughout.
10. Slowly and tightly roll up each rectangle, sealing the edges firmly.
11. Tuck the ends of the roll tightly under the bread and place into your prepared loaf pans. Repeat with the second loaf. Cover the loaves, set in a warm place, and let rise until doubled, about another hour.
12. Place one rack on the lowest position in the oven and preheat the oven to 425 degrees.
13. Bake the loaves for 15 minutes, then cover each loaf with aluminum foil to prevent the tops from browning too much.
14. Once covered with foil, bake for an additional 15 minutes.
15. Remove the loaves from the oven, place on a wire rack to cool, and lightly brush the loaves with the melted butter.
Nutrition Information:
Yield:
32Serving Size:
1 sliceAmount Per Serving: Calories: 156Total Fat: 11gSaturated Fat: 7gTrans Fat: 0gUnsaturated Fat: 3gCholesterol: 47mgSodium: 1347mgCarbohydrates: 270gFiber: 3gSugar: 0.9gProtein: 8g


Is that bread really 1300 calories per slice ???
Sounds excessive
Hi Pam! I didn’t even notice, haha. You’re right the calculator did that automatically and I’m not sure why it calculated that high! I manually added it up and changed the amount. I believe it’s closer to 156 calories per slice. Thanks for asking! 🙂